IMPORTANT RECOMMENDATIONS FOR FULL RADIO MODEM TELEMTRY
The very small Micro Receivers and Nano receivers only have 25 mW power output, so telemetry range is limited to a little less than 10 Kilometers. For long range telemetry, we strongly recommend that you use the any of the Dragon Link 1000 mW high power receivers. A 1000 mW high power telemetry Receiver will give you much further telemetry range ( approximately 400 % telemetry range increase ) than the 25 mW output that the smaller Micro Receivers will provide. ( NOTE: RC range on all receivers is approximately 50 Kilometers ), telemetry range does NOT affect RC range. RC control will still be there even after telemetry is totally gone.
1000 mW Receiver Telemetry Range: 50 + Kilometers
25 mW Micro Receiver Telemetry Range: About 10 Kilometers
Radio Control Range: A full 50 Kilometers on ALL receivers.
The Dragon Link Radio Modem will work with ANY flight controller or device that you would normally use with a stand alone Radio Modem.


Determine which hardware you have and chose the correct option.
There are 3 possible different hardware configurations that will require different wiring and settings. From the list below, determine which one applies to your hardware, and follow the instructions for your type of connection:
1. 2018 or Newer Receiver with 6 Pin UEXP cable, and flight controller with CTS and RTS connections. PROCEED TO RECEIVER SETUP BELOW.
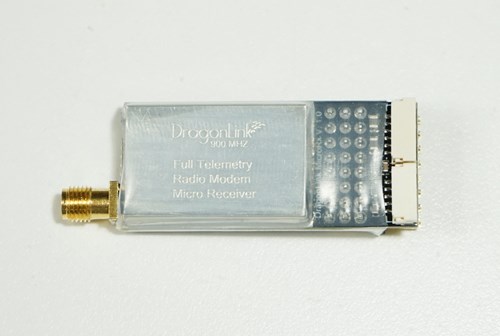
DRAGON LINK RECEIVER SETUP: 6 pin UEXP and Flight Controller has CTS and RTS
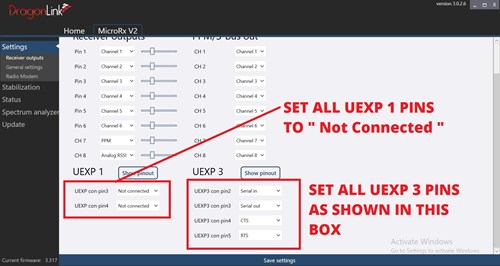
1. Connect your receiver to the Dragon Link GUI and select " Receiver Outputs " on the list to the left
2. Set UEXP 1 and UEXP 3 as shown in the picture.
UEXP1 con pin3 = Not Connected
UEXP1 con pin4 = Not Connected
UEXP3 con pin 2 = Serial In
UEXP3 con pin 3 = Serial Out
UEXP3 con pin 4 = CTS
UEXP3 con pin 5 = RTS
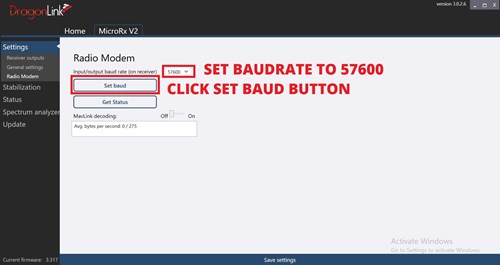
3. Click on " Radio Modem " in the list on the left.
4. Select 57600 on the " input/output Baud rate "
5. Click the " Set Baud " button.
6. Click the SAVE SETTINGS bar at the bottom.
7. Re-Power and REBIND your receiver to your Dragon Link Transmitter. These changes will not work until you have done a successful BIND.

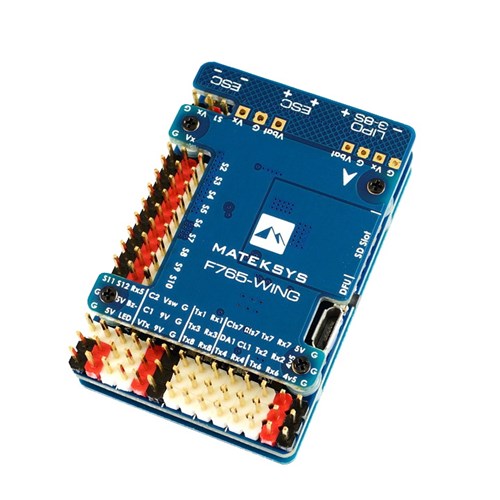
CONNECT RECEIVER TO FLIGHT CONTROLLER
See the pictures to the left to connect the Dragon Link Receiver UEXP 6 pin connector to the telemetry pins of your flight controller.
1. Connect the Black Dragon Link GROUND wire to the telemetry ground of your flight controller.
2. Connect Dragon Link Blue Serial IN wire to TX on your flight controller.
3. Connect the Dragon Link White Serial OUT wire to RX on your flight controller.
4. Connect Dragon Link CTS wire to CTS on your flight controller.
5. Connect Dragon Link RTS wire to RTS on your flight controller.
6. DO NOT connect the Dragon Link RED wire to anything, you will burn something out if you do this !!!

CONFIGURATION: Ardupilot and Mission Planner.
We strongly recommend loading the latest ArduPilot firmware on to your flight controller. Even though Dragon Link will work with INAV and other flight controller software... ArduPilot is better in every way, flys better, less crashes, more reliable, more features. ArduPilot is industrial grade software that you can get for free !!!!
1. Connect your flight controller to Mission Planner, and select CONFIG at the top, and then click " Full Parameter List " on the left. You will see a large list as in the picture. Change the following Parameters:
BRD_SER1_RTSCTS = 1
SERIAL1_BAUD = 57
SERIAL1_PROTOCOL = 2
SR1_EXT_STAT = 1
SR1_EXTRA1 = 5
SR1_EXTRA2 = 5
SR1_EXTRA3 = 1
SR1_PARAMS = 10
SR1_POSITION = 3
SR1_RAW_CTRL = 1
SR1_RAW_SENS = 1
SR1_RC_CHAN = 1
2. Click the " Write Params " box on the right.
3. Configure your flight controller as needed for your plane. Full flight controller setup is more than we can possibly cover here. Some controllers will have different telemetry ports, etc. If you need help with this you can post questions in our support forum.
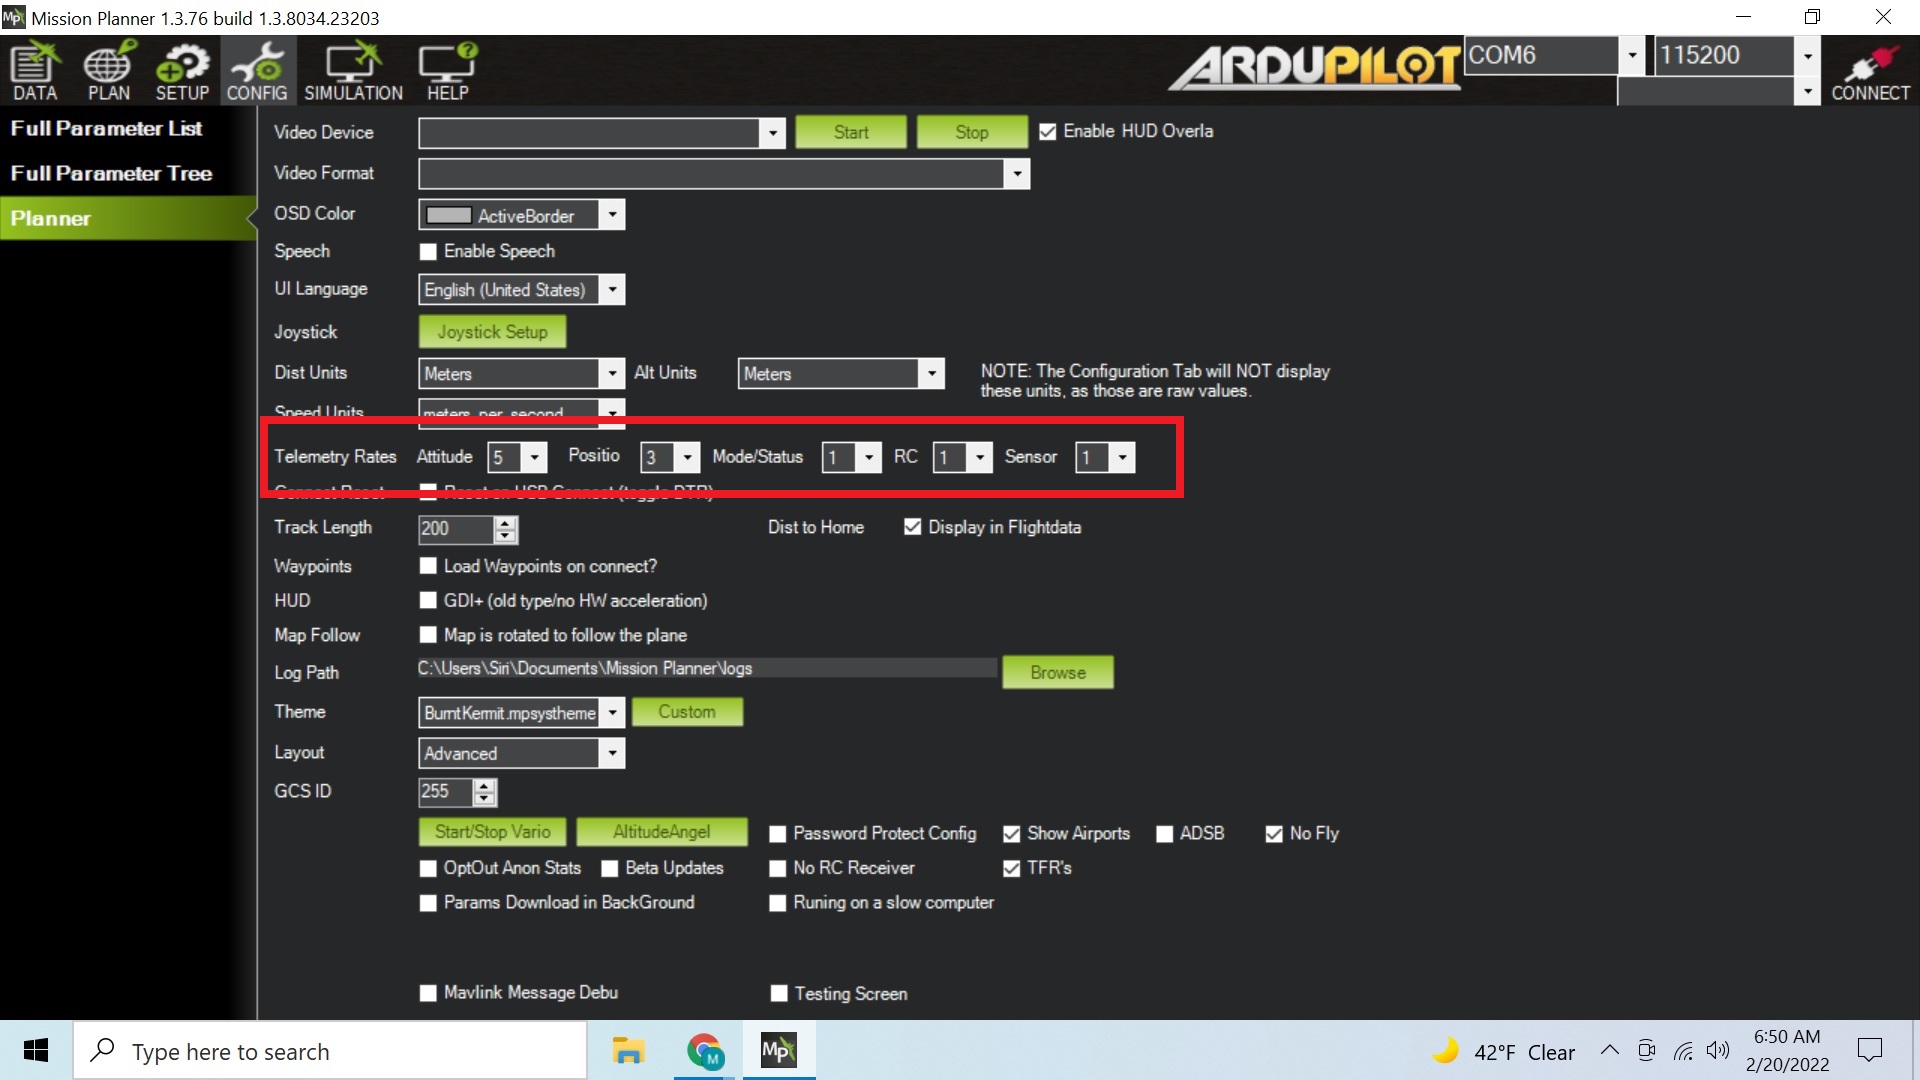
MISSION PLANNER CONFIGURATION - Do this for each computer that you will be testing and flying with:
Click the CONFIG tab at the top and set the following as shown on the picture to the left:
Attitude: 5
Position: 3
Mode/Status: 1
RC: 1
Sensor: 1
CONFIRM DATA IS GETTING PROPERLY SENT FROM YOUR FLIGHT CONTROLLER TO YOUR DRAGON LINK RECEIVER.
There are a lot of setup problems that can prevent telemetry from working... It is important that you confirm your flight controller connection and setup are working before moving to the next step.
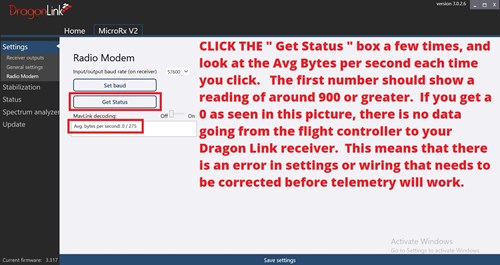
1. Power on your flight controller and your Dragon Link receiver, then connect your Dragon Link receiver to the GUI.
2. Click " Radio Modem " on the left and then click the Get Status box a few times. Each time you click it, you will see two numbers like the 0 / 275 in the white box below. The first number indicates data being transferred from your flight controller to your receiver. If the first number is approximately 900 or greater, you have good data being read by the Dragon Link receiver. If the first number is very low, like 0 or 100, something is wrong in setup or wiring, and telemetry will not work. If you get stuck here and need help, post in our support forum and we will be happy to help you figure out where the problem is.
TESTING RADIO MODEM TELEMETRY:
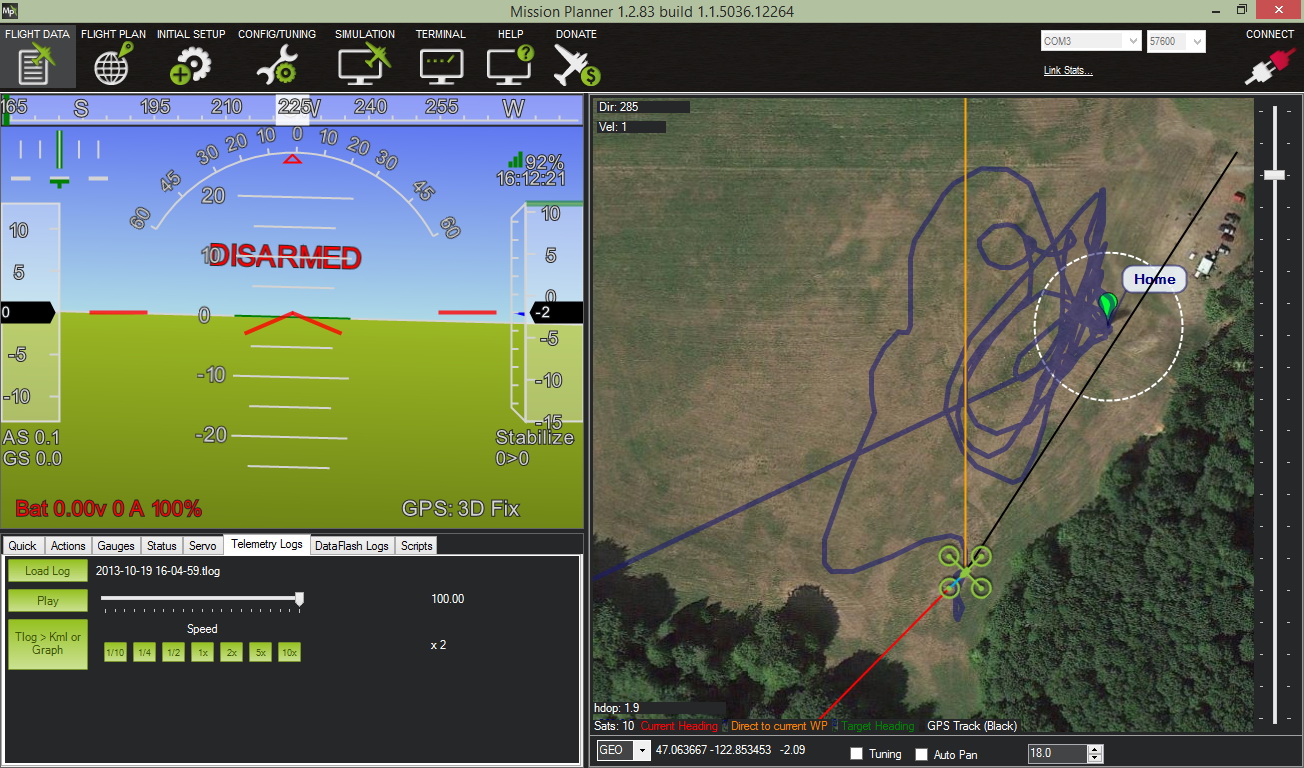
It is best, but not required to test radio Modem Telemetry by connecting your Dragon Link Transmitter to Mission Planner using a USB Cable. Even though you will be using WiFi or Bluetooth to to connect your Dragon Link to your computer, tablet, or phone, there are a number of errors in wireless setup that can result in telemetry not working. If you connect using wireless without testing the, and telemetry does not work, you will have no idea where to start looking for the problem.
The easiest and most reliable way to connect telemetry to your computer is via USB cable by doing this:
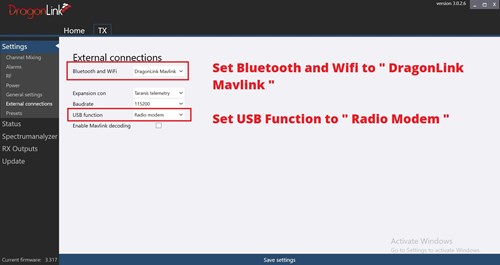
1. Connect your Dragon Link transmitter to the GUI and click on " External Connections " on the left.
2. Set Bluetooth and WiFi to " DragonLink/Mavlink "
3. Set USB Function to " Radio Modem "
4. Click the SAVE SETTINGS bar at the bottom of the screen.
5. Power ON the flight controller and Dragon Link receiver.
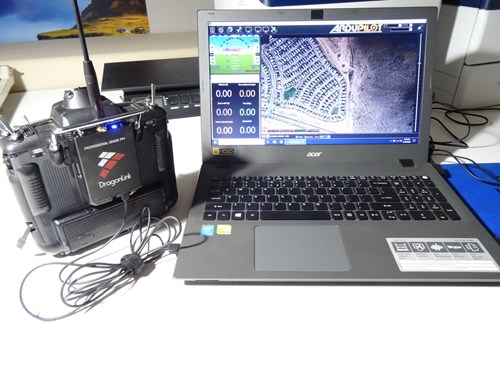
5. Repower the Dragon Link Transmitter and connect the USB cable from your Dragon Link transmitter to a USB port on your computer as shown in the picture. You should now have a solid blue LED on your Dragon Link Transmitter.
6. You will see a COM PORT open up on the mission planner connect tools on the top right of the mission planner screen. The COM port will be a different number with every system, so it is not possible to tell you what the COM number will be.
7. Mission planner should connect to your flight controller, and parameters should load perfectly and take less than 1 minute to load.
8. You must get a valid connection, and have parameters load smoothly and within a minute before moving on to WiFi or Bluetooth. If the radio modem connection does not work with the USB cable, it will not work with WiFi or Bluetooth. If you pass this test move onto the next step below.
IMPORTANT: You must EXIT USB TELEMETRY MODE on your Dragon Link transmitter before it will work with the GUI again. This procedure is described in the next step.
1. Hold down the MENU button while you power on the Dragon Link Transmitter. Hold it until MENU OPTION 5 which is a WHITE LED and 5 Beeps. Release the MENU button when the LED turns white.
2. Wait 5 seconds to assure you are in the correct mode with a WHITE LED, then power OFF the transmitter.
3. Connect the Dragon Link Transmitter to the USB port and GUI, you should get normal GUI operation.
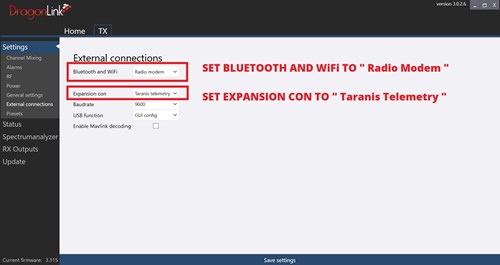
4. Set Bluetooth and WiFi to " Radio Modem " as shown in the picture to the left.
5. Set Expansion Con to " Taranis Telemetry " as shown in the picture to the left.
6. You are now done with the telemetry test, and it is time to set up WiFi or Bluetooth connection to your device. Whichever you prefer !
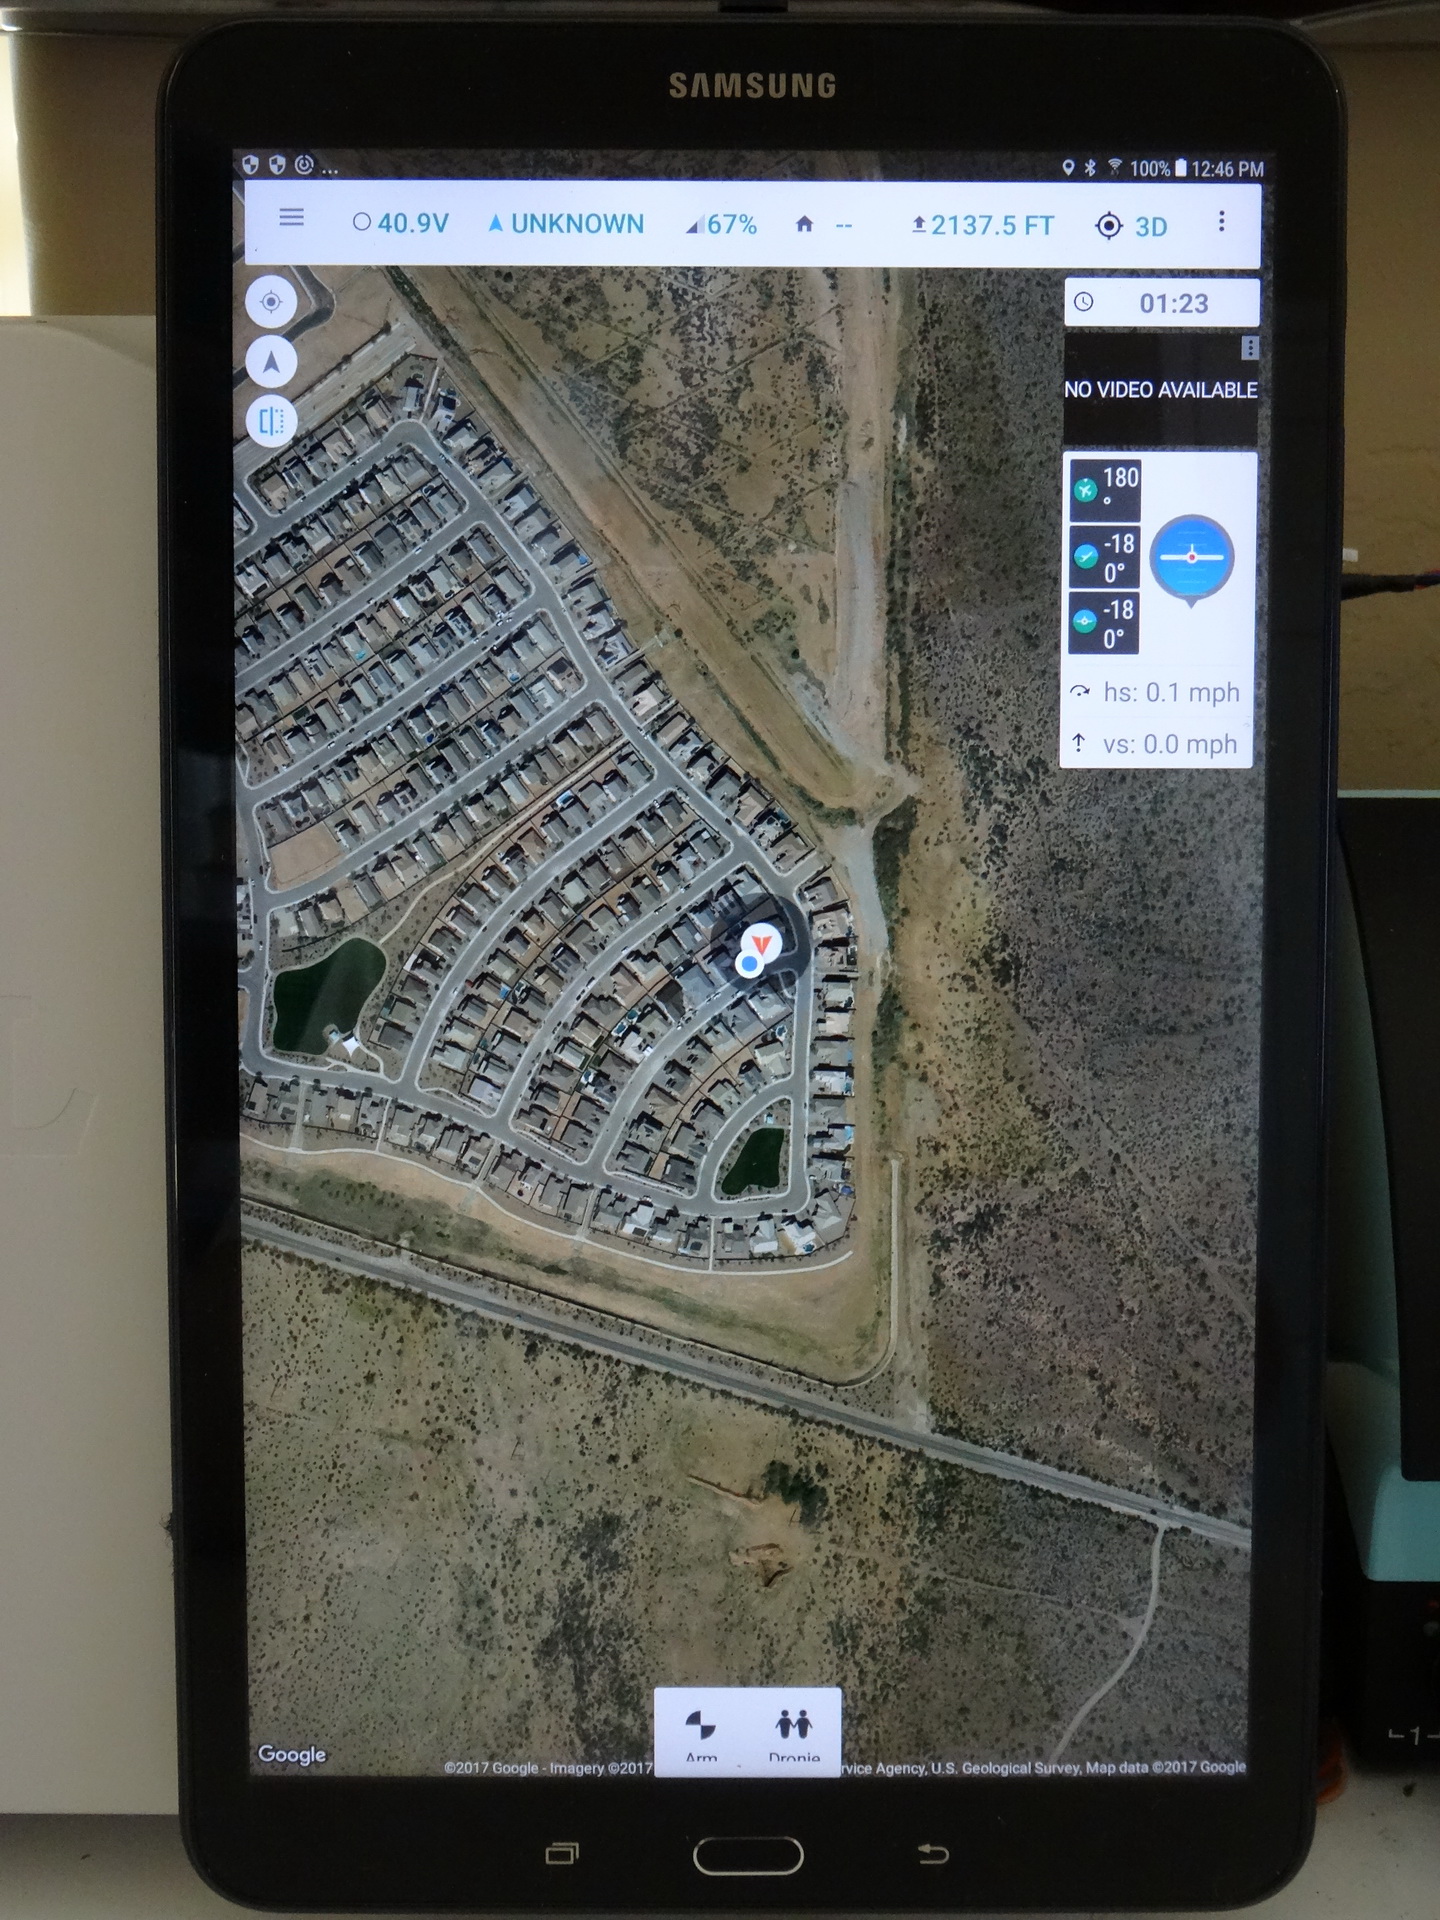
TELEMETRY DISPLAY ON ANDROID DEIVCE
1. Install QGroundControl software on your android device by downloading it from Google Play.
2. You have 2 options to connect your Dragon Link transmitter to your Android device, either by WiFi or Bluetooth. Connect the WiFi or pair the Bluetooth to your phone or tablet now.
3. Open the QGroundControl app.
4. Choose connect either by TCP/IP or Bluetooth and configure accordingly.
5. You should now see the telemetry and moving map and other information on QGroundControl.
QGroundControl website CLICK HERE