Eagle Tree Vector Telemetry Setup:
The Dragon Link system can transmit Eagle Tree Vector telemetry to your android tablet, phone, or computer running TOWER, MISSION PLANNER, Q Ground Control, or other program that recognizes standard Mavlink Protocol. This is a huge advantage in keeping track of your planes position using the moving map display. It also provides a big safety factor as you can display the planes flight instruments, artificial horizon, etc to fly your plane home in case of lost video. Enabling this telemetry function will not reduce the range nor affect your RC signal in any way, there is just no downside to using this. The connection and setup of this feature is very easy, and we recommend this to every plane that Eagle Tree Vector installed to take full advantage of this amazing capability.
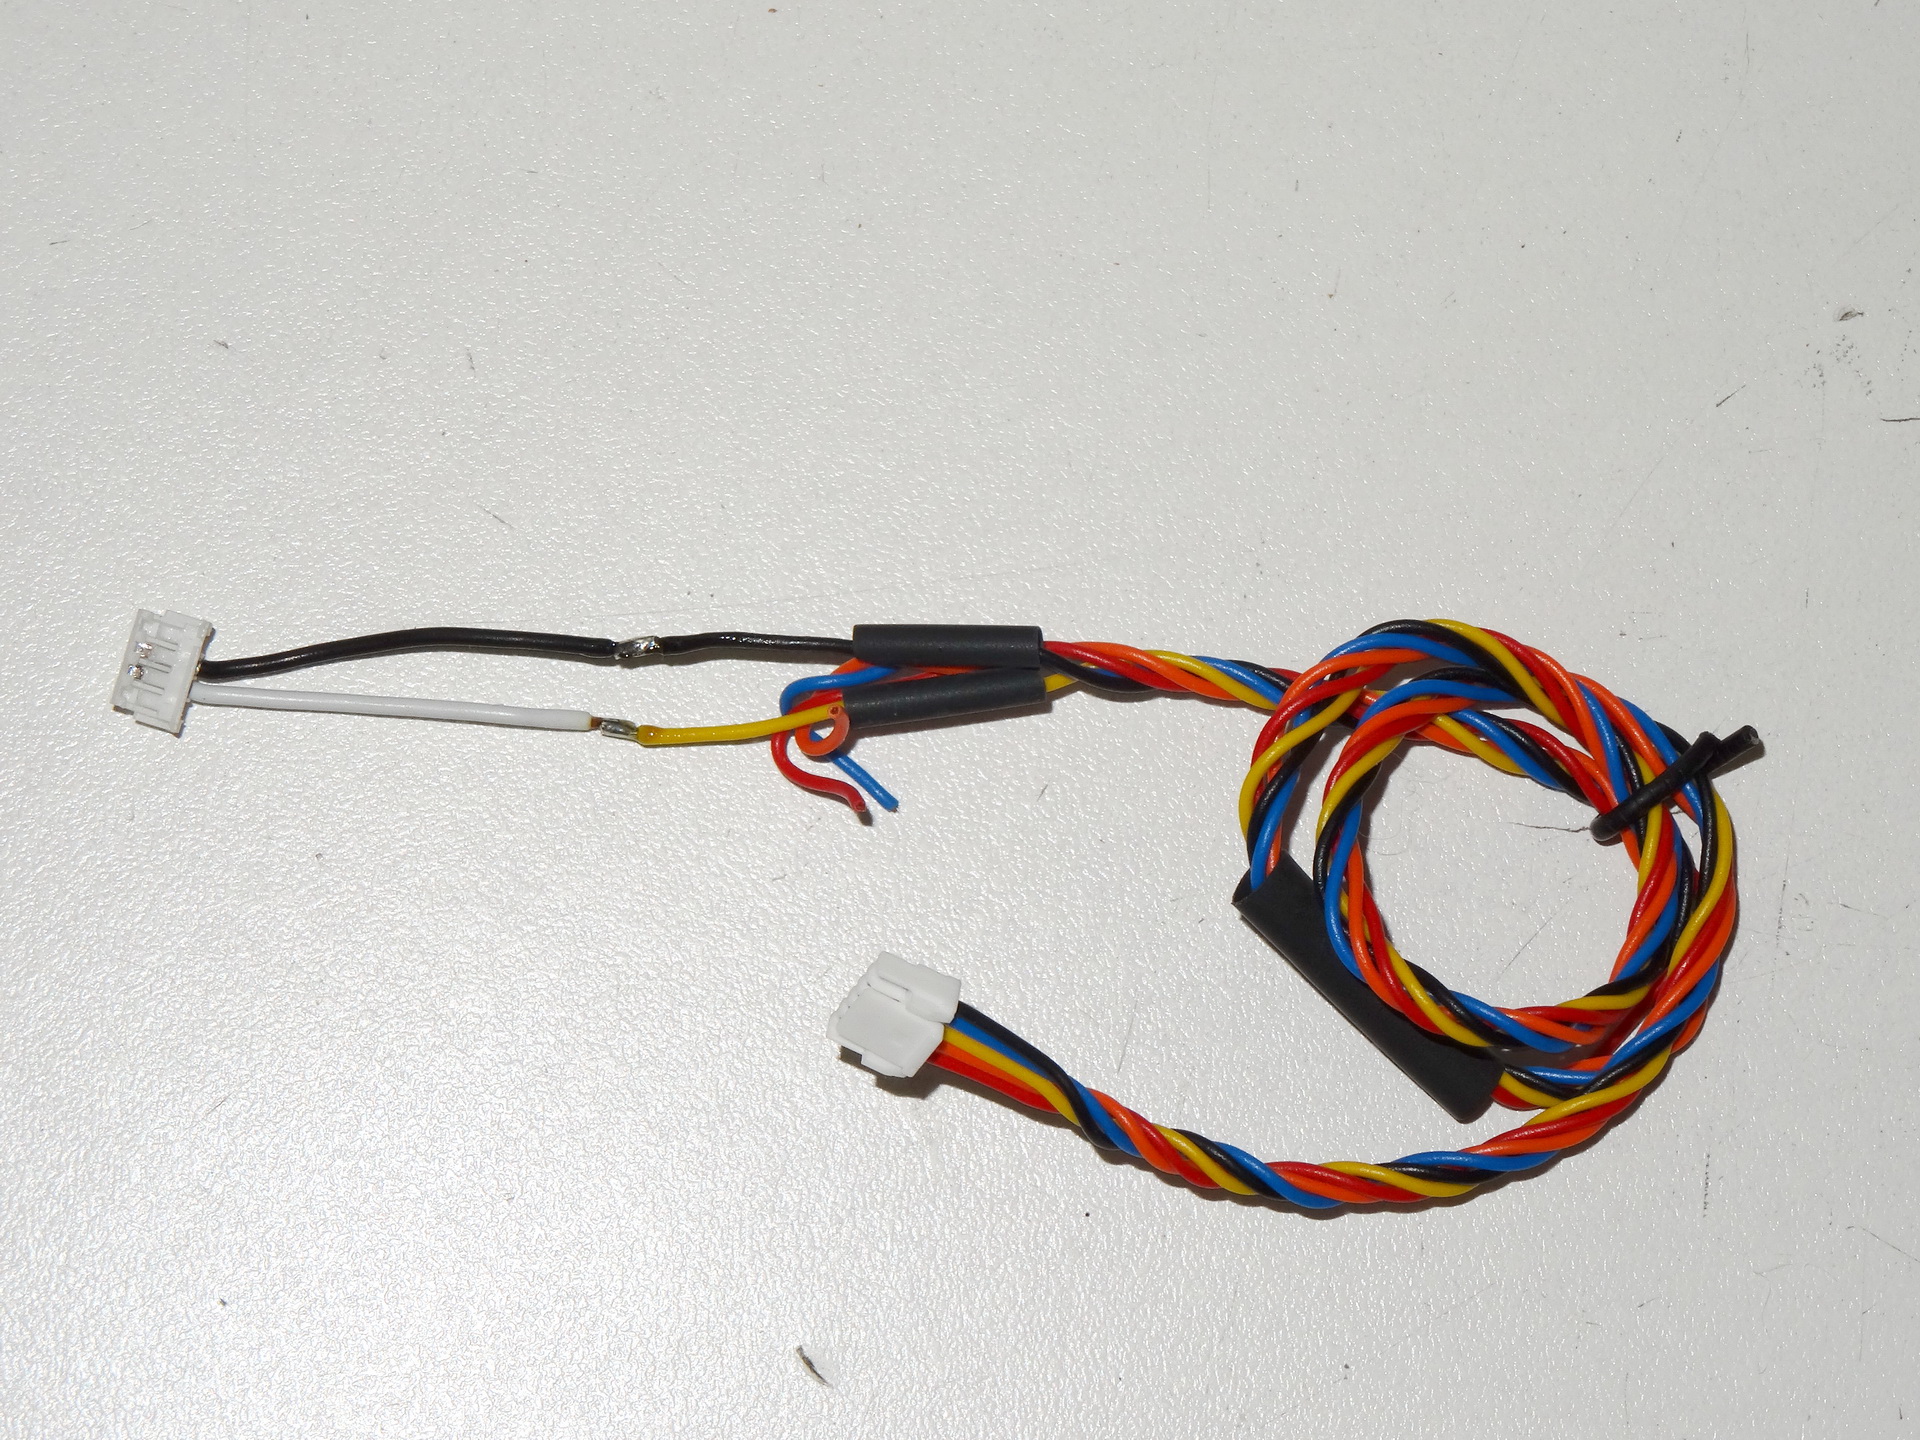
Splice the Dragon Link UEXP cable to the Eagle Tree Vector Cable.
VECTOR BLACK - DRAGON LINK BLACK
VECTOR WHITE - DRAGON LINK YELLOW
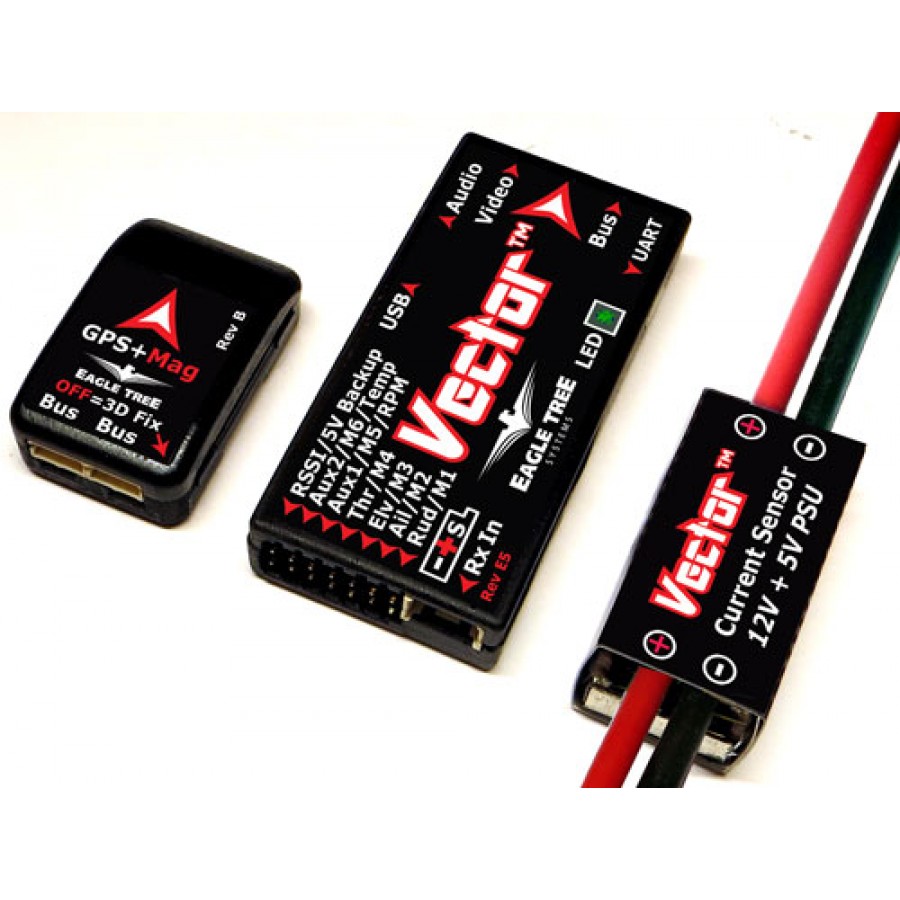
Also, confirm the pin positions in the picture to the right. We removed the other wires from the Vector Connector for clarity as they are not used. We recommend that you do not remove these wires, as they help relieve the stress at the connector when they are all together.
CONNECTING DRAGON LINK RECEIVER TO VECTOR:
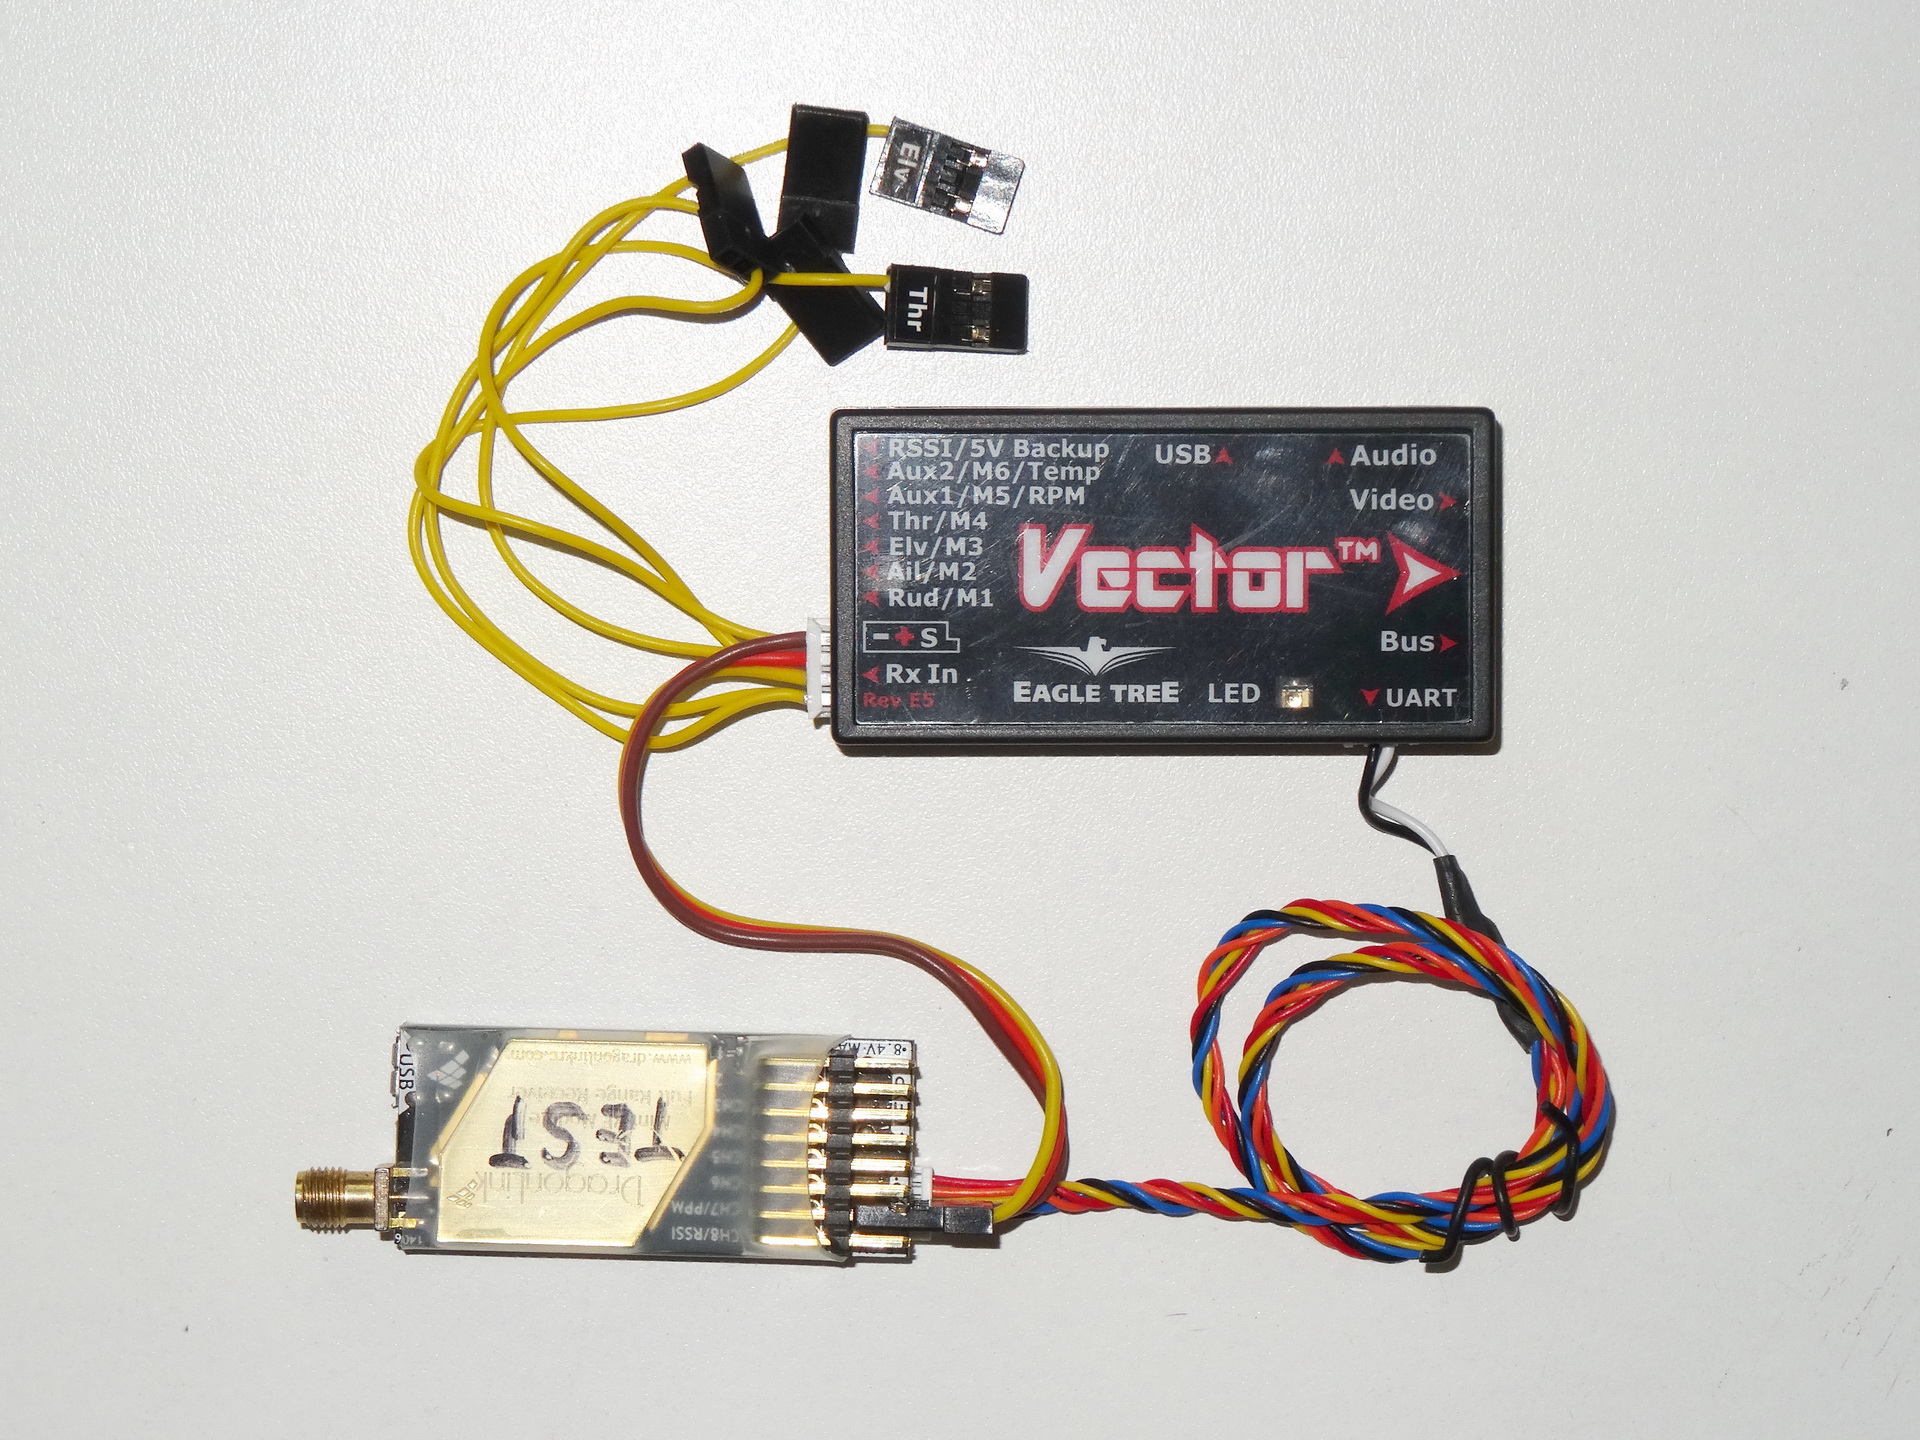
Here is a picture of the Dragon Link system connected to the Full sized Vector. The Dragon Link will also connect and work in the same way when connected to the Eagle Tree Micro Vector.
1. Simply connect the Vector AILERON cable to the PPM output pins of the Dragon Link Receiver as shown to the right.
2. Connect the UEXP port of the Dragon Link receiver to the UART port of the Eagle Tree Vector with the cable you spliced above.
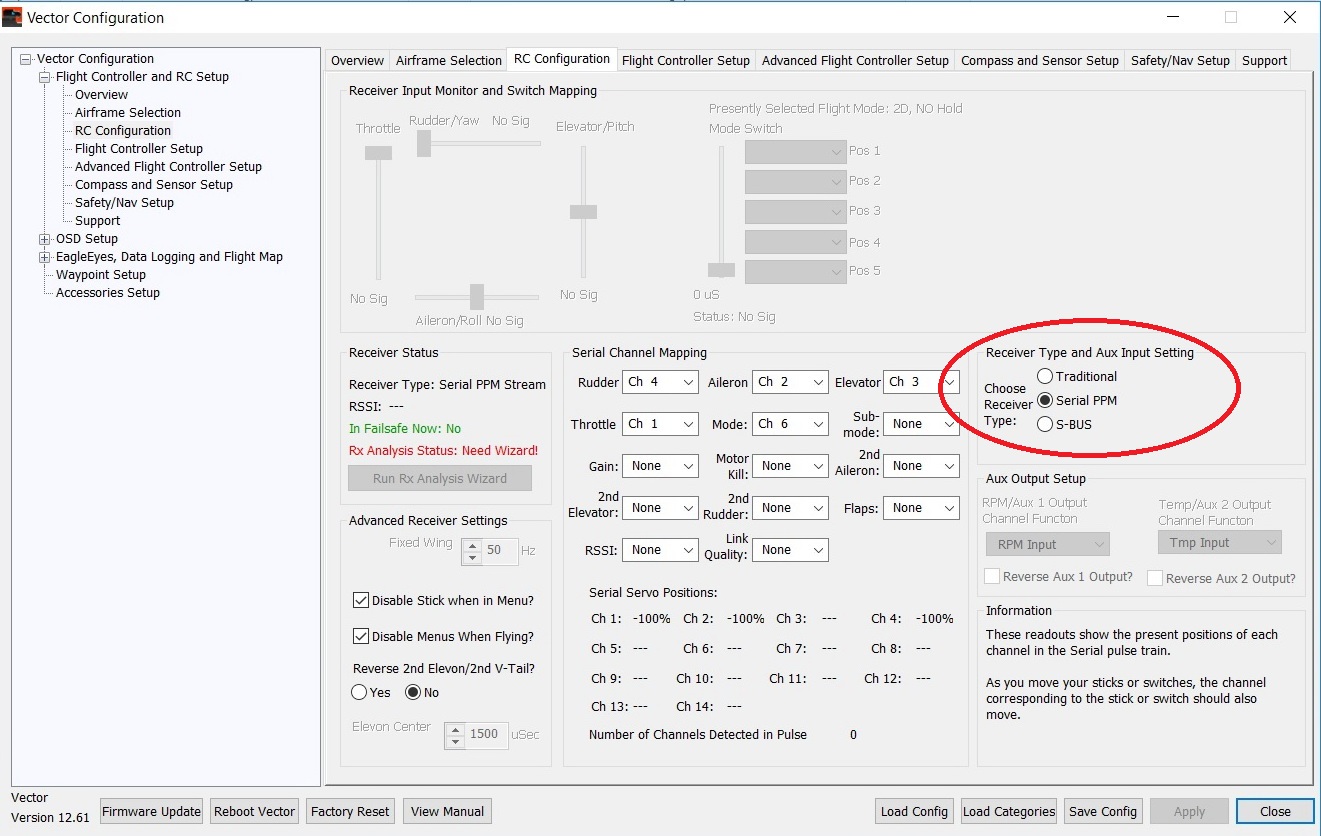
Open the Eagle Tree Vector installation software, and set the " receiver type and Aux Input setting " to SERIAL PPM as shown in the picture to the right.
This step can ONLY be done through the RC control of the Vector On Screen Menu, this option does NOT appear in the Vector computer configuration program.
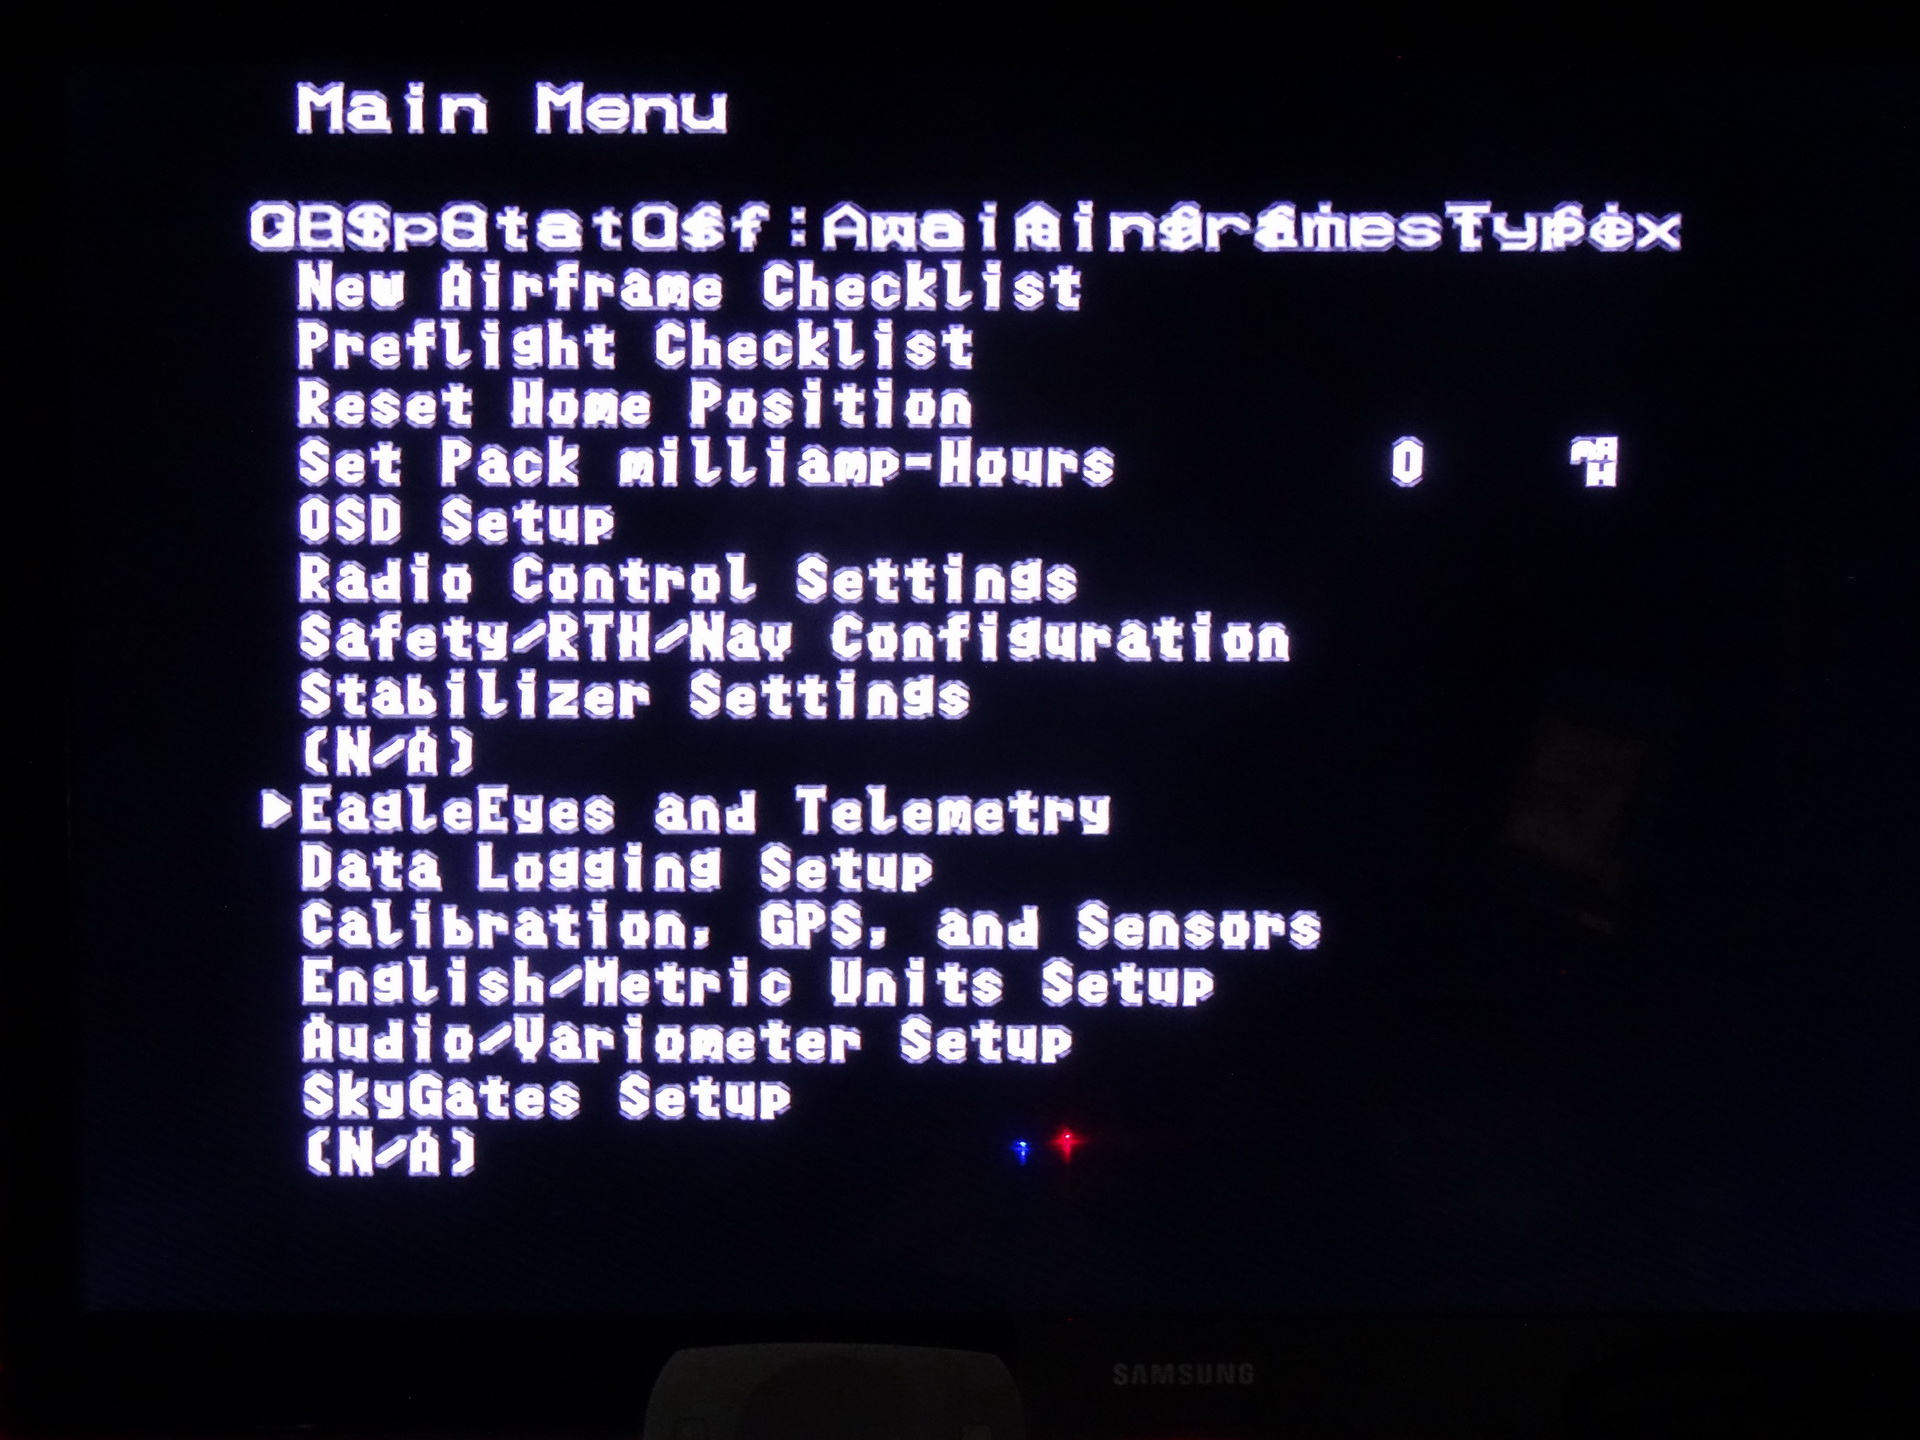
1. Install and power up the Vector OSD so that you can see its display on the screen, and go into the menu mode.
2. Select the " EAGLE EYES AND TELEMETRY OPTION " as shown on the screen to the right.
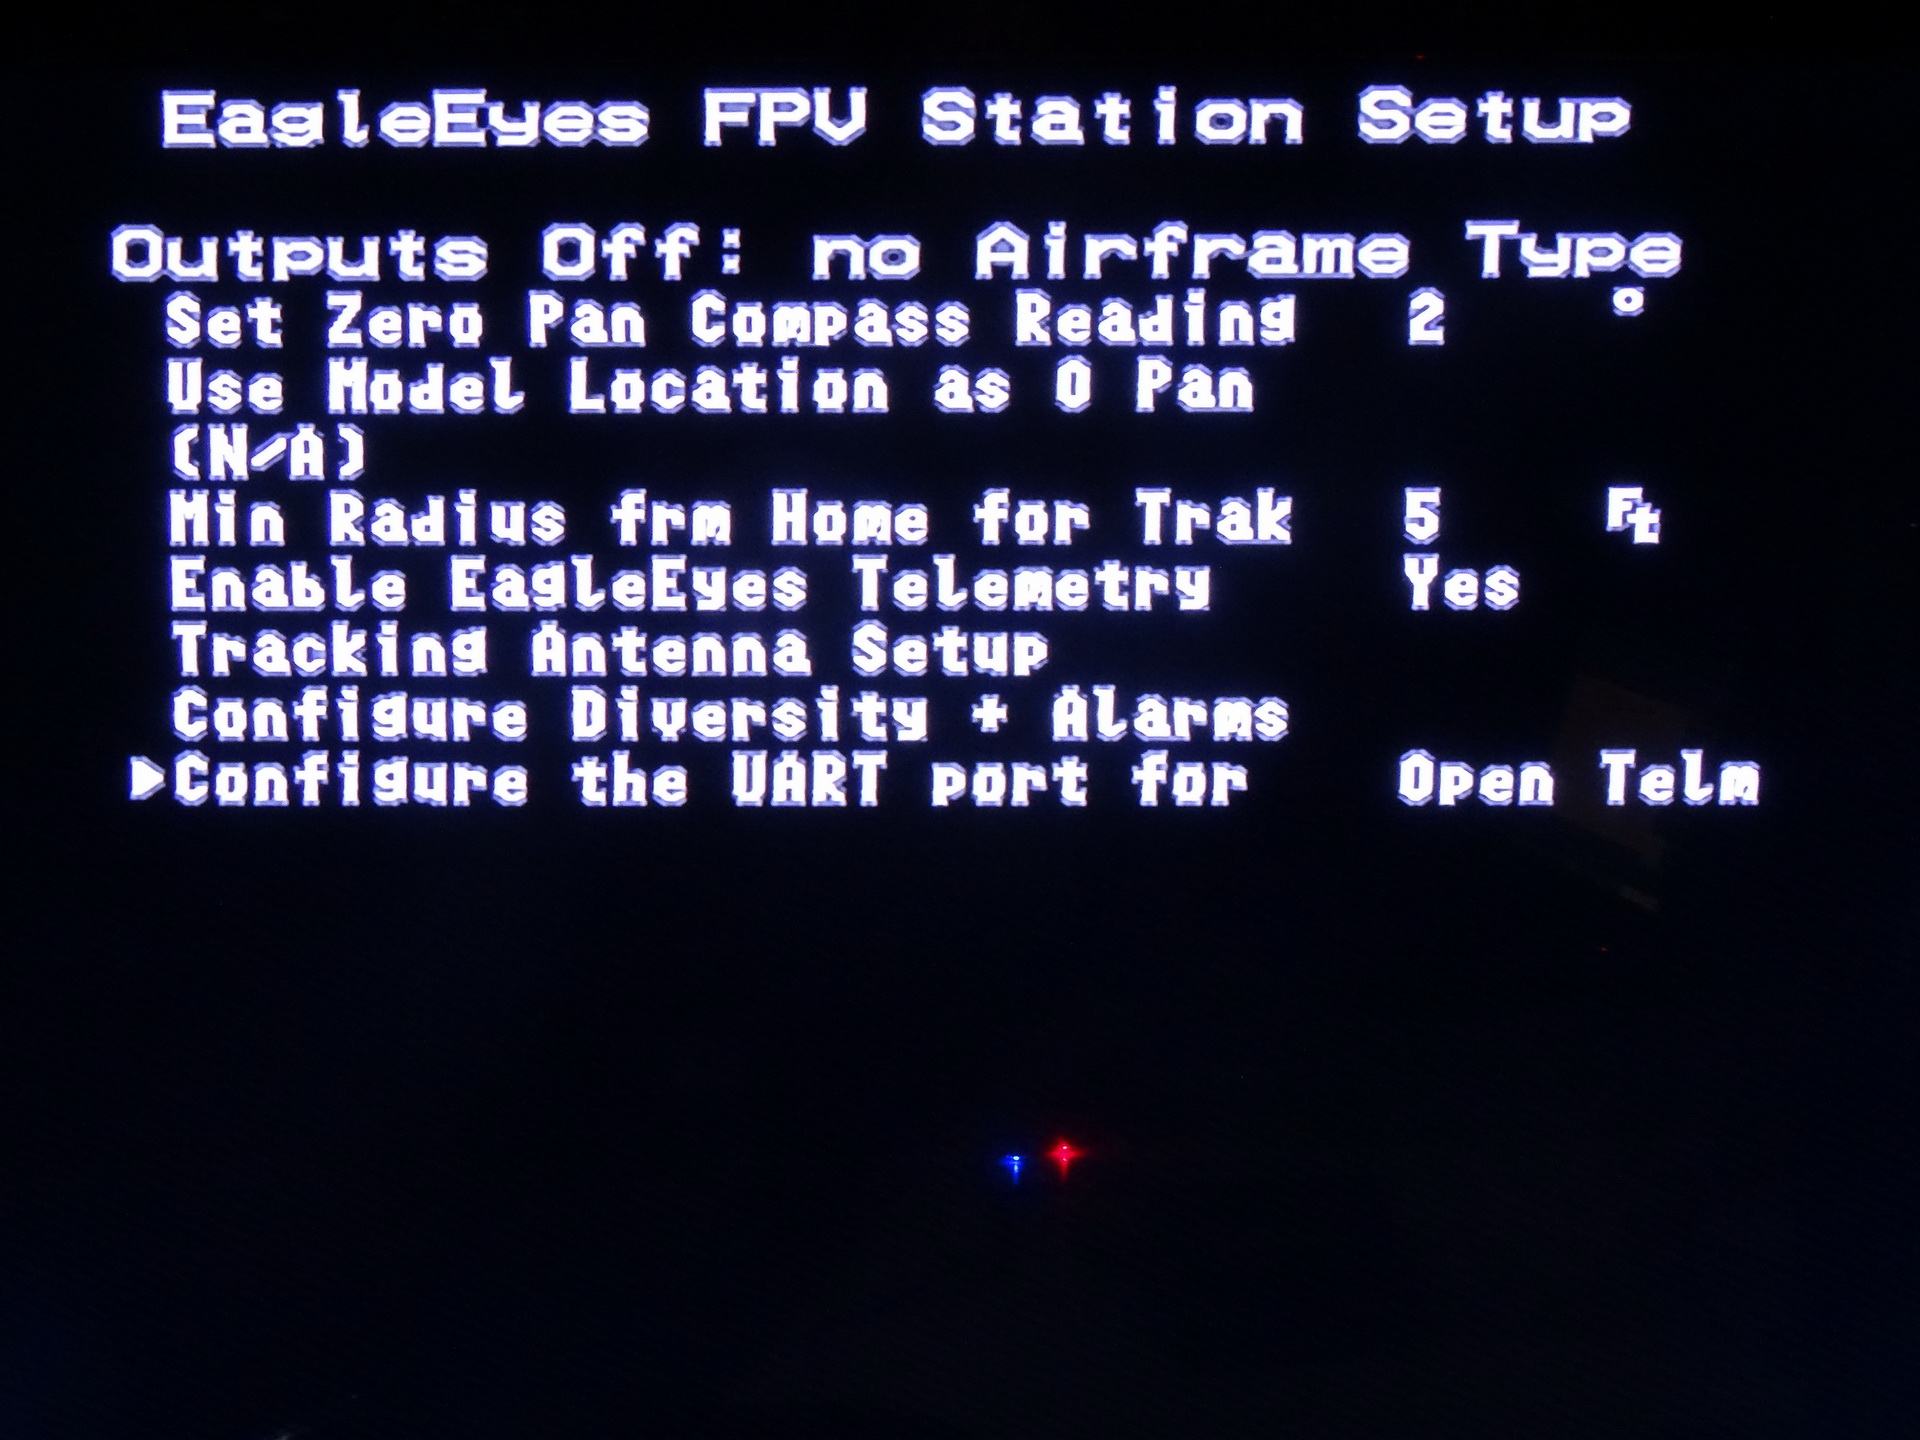
3. Then Select " CONFIGURE THE UART PORT FOR " then set " OPEN TELEM " as shown below.
Start with the Dragon Link DEFAULT Transmitter and Receiver configurations. Note, changing advanced options in the Dragon Link can led to decreased performance, we strongly recommend using DEFAULT settings. If you have accidently changed the Dragon Link settings, you can always go back to default by choosing RESET HARDWARE TO FACTORY SETTINGS in the GUI program and then clicking SAVE at the bottom.
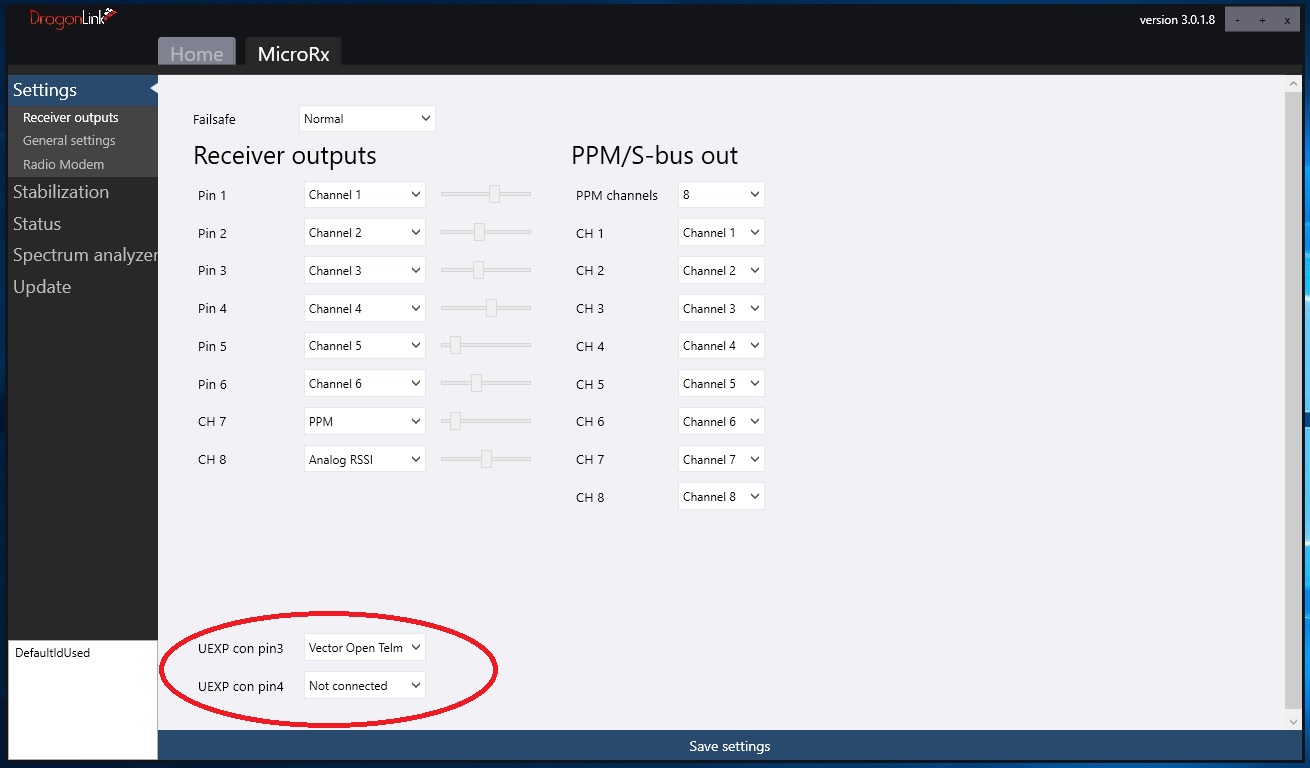
1. Select the RECEIVER tab at the top, and then RECEIVER OUTPUTS on the right and you will see this screen displayed.
Set UEXP Con PIN 3 as VECTOR OPEN TELEM
Set UEXP Con PIN 4 as NOT CONNECTED
Make sure you click the SAVE SETTINGS bar at the bottom, if you do not save settings, changes will not work.
Repower the receiver for changes to take effect.
NOTE: On some smaller displays, the UEXP pin settings might be hidden and not visible, use the bar on the right to scroll down to see them.
BLUETOOTH CONNECTION TO TABLET OR COMPUTER:
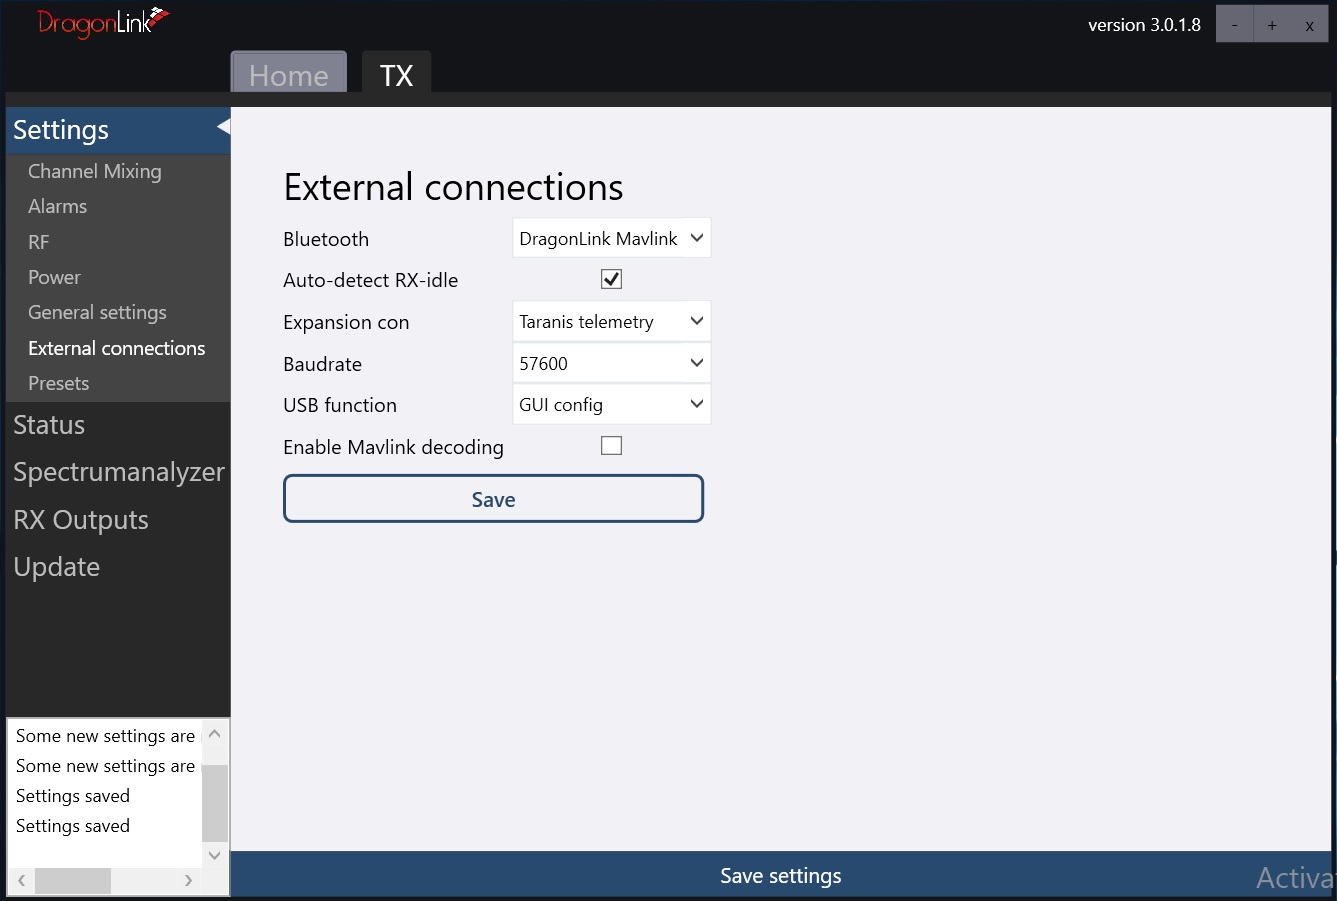
We suggest using the Bluetooth method of telemetry, it is easy, does not have the hassle of needing any wires attached, and is just the best solution for most people. By default, the correct setting for Bluetooth is already made as shown in the picture to the left, so you do NOT need to do anything in this section. You will see Bluetooth set to DragonLink Mavlink already selected. If you are using Bluetooth, DO NOT configure the USB connection or SERIAL PORT connection you see below. Just SKIP this entire section and install the software onto your computer.
_______________________________________________________
WIRED OR USB CONNECTION TO COMPUTER:
USB CONNECTION: If you want to connect your Dragon Link to your computer via the USB cable or Expansion Con ( serial ), you can. Change the USB Function to DragonLink Mavlink and the USB will now provide telemetry information to your computer.
NOTE: When USB Function is set to DragonLink Mavlink, the Dragon Link Transmitter will stop communicating and not work with the GUI since it changes the USB port to a data port only. To get back to GUI mode, hold down the MENU button, power up the transmitter until you get a flashing WHITE LED, then release button. Repower and the transmitter will work in GUI mode again.
SERIAL PORT ( UEXP Port ) CONNECTION TO COMPUTER: You can provide telemetry data to your computer as serial data via the UEXP port. In order to do this, set the EXPANSON CON setting to DragonLink Mavlink and set the baud rate you desire. Make sure you click the SAVE box for the change to take effect. The Dragon Link transmitter will now output telemetry data in serial data format via the UEXP port.

1. For an android phone or tablet, download and install the " TOWER DRONE APP " from Google Play and install. For Windows computers download and install " MISSION PLANNER " software.
2. Open the TOWER app, and choose the connection options. You will see a list come up, choose the correct Bluetooth, or USB option depending on what connection method you have chosen.
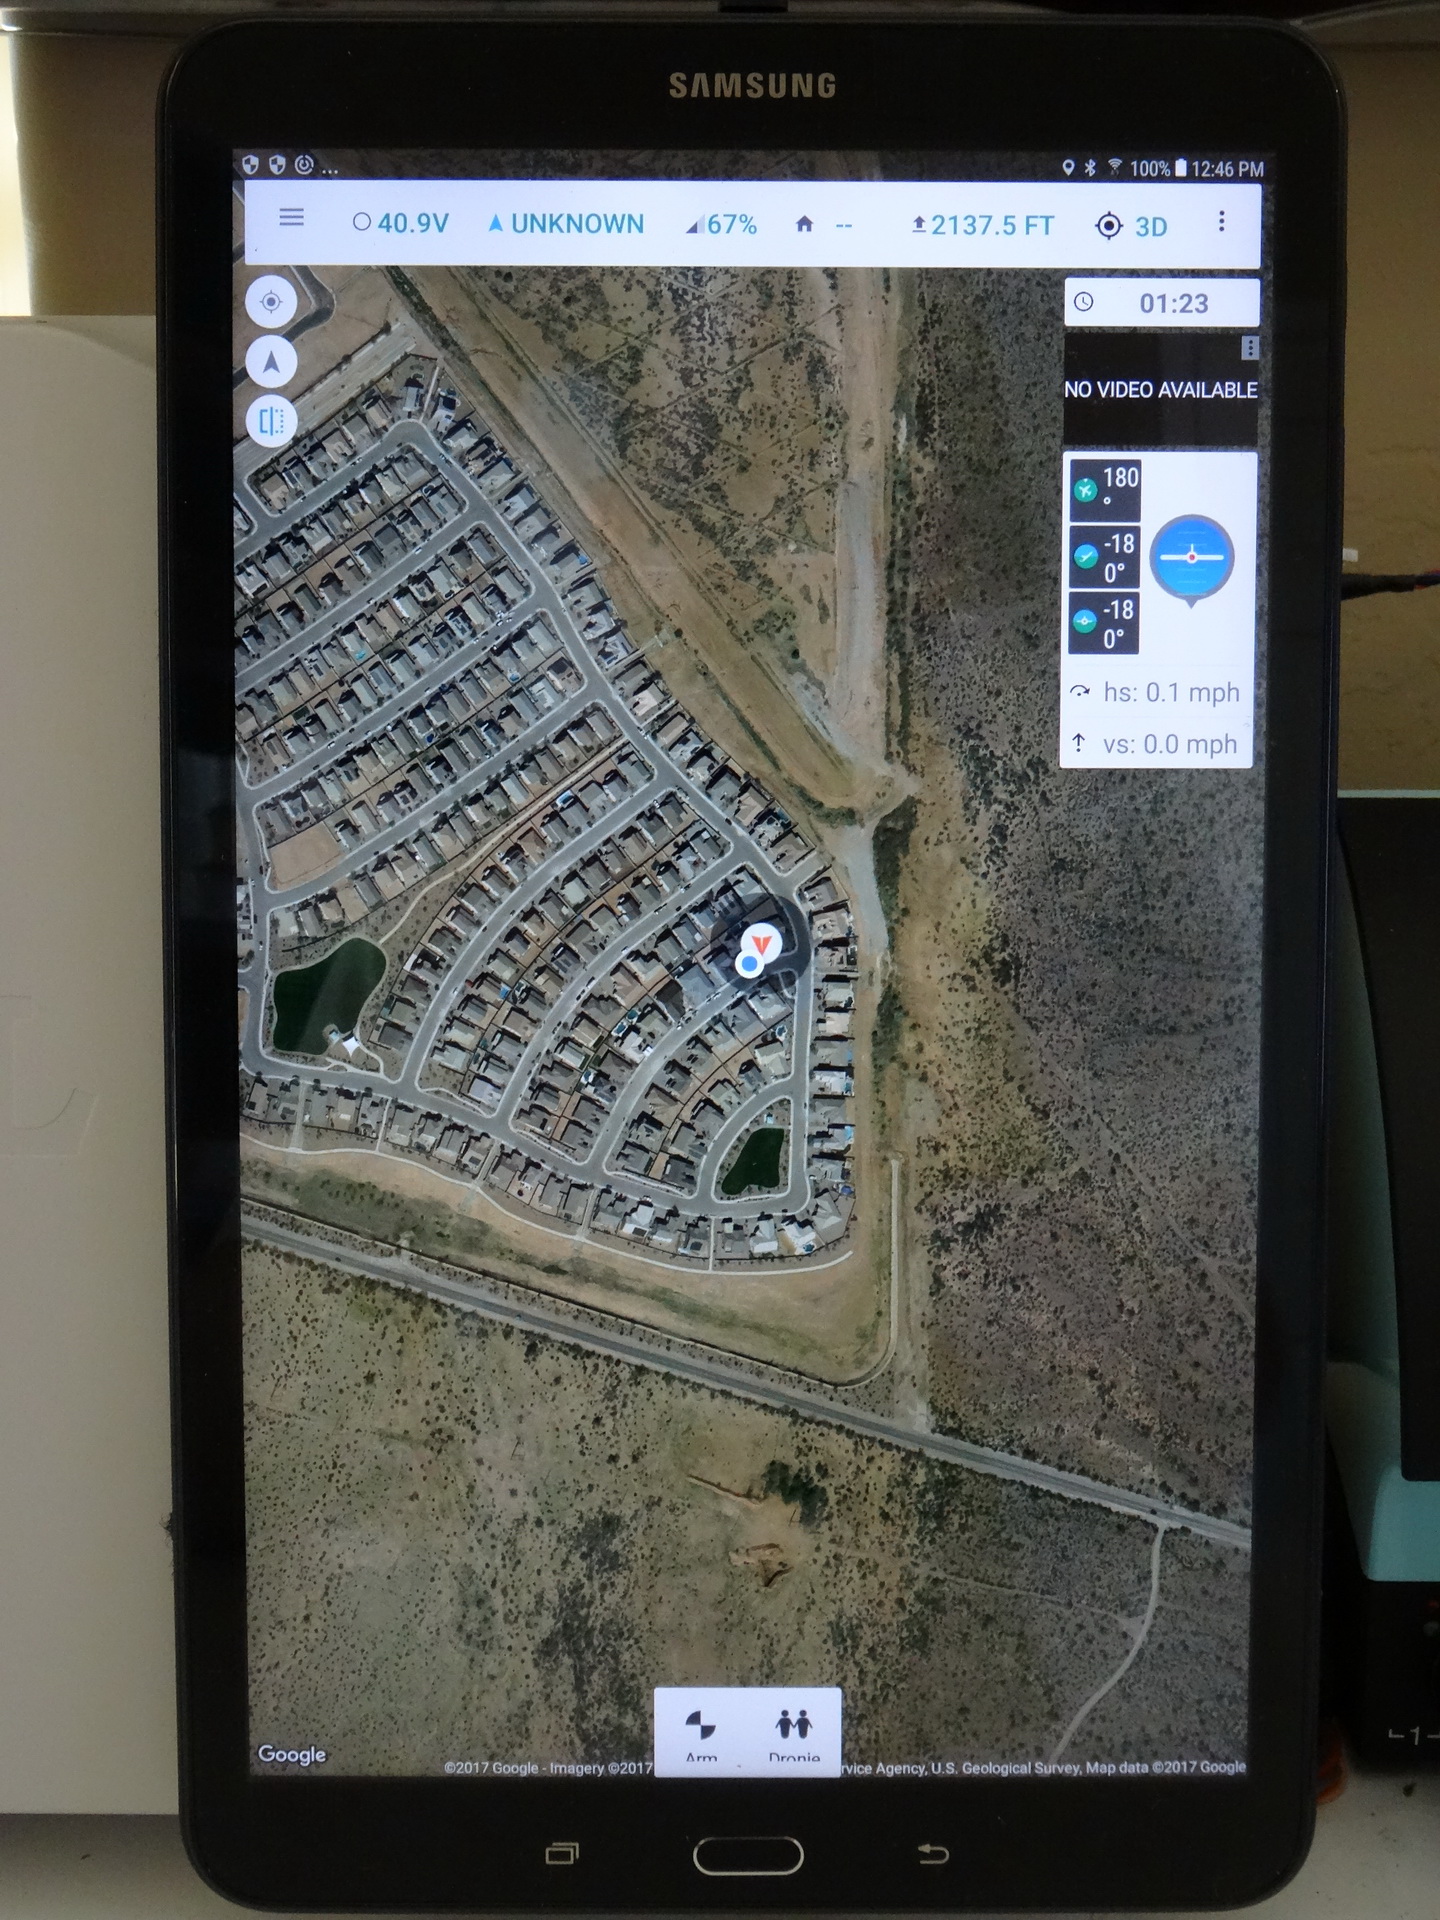
3. With the complete Dragon Link system turned on, you should see the positions and other information on the map. There is NO REQUIREMENT to be connected to any kind of wireless network for this to work once you have the map area stored in cache.
4. IMPORTANT !!!!! We do NOT write the TOWER or MISSION PLANNER software. This software is very popular, and does work very well with minimum configuration, there are also many advanced features and options that can require a lot of effort to set up and learn. We obviously can not support products or software written by another company. For basic and advanced usage instructions of this software, you must go to the website of the people that write the software. There are also many forums and YouTube videos that support this software.
http://3dr.com/support/sections/201241146/site_scan/
http://ardupilot.org/planner/docs/mission-planner-overview.html